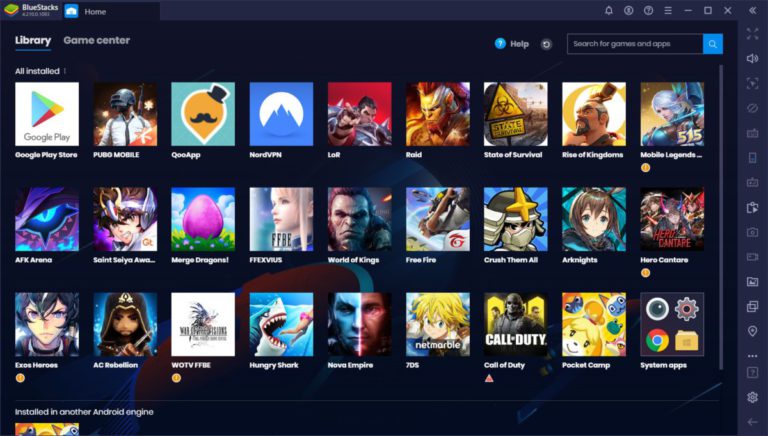
BlueStacks is a program designed to run games/programs from the Android operating system on personal computers running Mac OS and Windows.
The project supports the installation of software from official and unknown sources.
BlueStacks system requirements
Before installing the emulator, you need to make sure that your PC meets the minimum requirements. The current version of the BlueStacks 4 program will be given as an example:
- Operating system: Windows 7/8/8.1/10;
- Processor: BlueStacks virtualization requires CPU support from AMD or Intel with the same technology;
- RAM: at least 2 GB;
- Hard drive: 4 GB;
- Optional: Administrator rights, updated video card and chipset drivers.

Please note that the program may work on weaker PCs, but stable playback of applications is not guaranteed.
Emulator settings
Before launching any application, it is important to know how to set up BlueStacks. To make adjustments to the program, you will need:
- After activating the emulator, log in with a Google account or create a new one.
- In the tab bar, select the gear to go to the settings.
- Go to the menu with the corresponding name.
A list of basic parameters to change will open. Before starting the BlueStacks game, you can fix:
- Screen – here you change the resolution and adjust the DPI. Look at the specifications of your monitor. High DPI requires additional system resources.
- Engine – designed to select the DirectX or OpenGl graphics mode, there is an own development from the manufacturer, but it is at the beta test stage. As practice shows, if one mode shows a poor result, then it makes sense to switch to the second option. Below you can select the cores used and the amount of RAM. The higher these figures, the better the performance in applications.
- Quick Hide is a convenient option to launch BlueStacks on top of windows or hide it instantly. The user defines the combination.
- Notifications – responsible for active notifications from programs and games. If you are going to play “farms” and “three in a row” it makes sense to leave them.
- Settings – here you can select the language, adjust performance (turning off the display of websites or switching between applications). You can change the platform, including creating shortcuts to installed games on the PC desktop.
- Backup and updates – responsible for restoring data and updating the software version.
For those who cannot understand BlueStacks how to use the new settings, you need to restart the program.
More often than other questions from users, you can hear how to set up controls in BlueStacks. Often this happens automatically for each individual game. But for convenience, advanced settings are provided, including the addition of a D-Pad and shortcut buttons, which is ideal for online shooters and mobs. To add new controls:
- Launch any application;
- Activate the button configuration (located on the bottom panel, depicted as a keyboard);
- Assign keys and reload the game.
In order for the new control to start working in BlueStacks, switch the slider to the active mode of the assigned keys. It is located directly next to the control settings.
How to upload games to BlueStacks
There are several ways to get games in the emulator. The easiest is to visit Google Play or use the developer’s application center (in fact, they are the same thing).
An equally popular way to launch the game is to install the APK file:
- Open the secondary menu next to “Installed apps” (looks like three dots).
- Select “Install APK”.
- Specify the file path to it and wait for the process to finish.

There are several ways to enable the game on BlueStacks:
- Select it inside the program;
- Double-click on the shortcut on the desktop (if their creation is not disabled in the settings).
If you are dealing with a game or application cache, you will first need to import it into the system from Windows, and then use a third-party file manager to transfer it to the specified folder (you will need to create the “obb” directory yourself). It is most convenient to do this operation using ES Explorer or Total Commander. Imported files go to the DCIM – SharedFolder folder.
Launch problems
The most popular program error is the moment when the virtualization engine does not start in BlueStacks. This happens especially often with the third version of the emulator.

To fix the problem, try:
- Restart your computer;
- Disable antivirus while starting the emulator;
- Free up RAM.
A prerequisite must be compliance with the minimum requirements of the PC.
Developer and reward system
The campaign of the same name is responsible for the development of the project. They continue to improve the virtualization engine and try to make the BlueStacks keyboard work just as well as a mouse (acts like a touch on the screen). The emulator provides a system of rewards and customization. It requires an investment of internal currency, which is earned for completing simple tasks or for real money.